Showing posts with label free pattern. Show all posts

Tuesday, June 1, 2010

Simple Crochet Spiral Necklace Pattern: A Quick Project

This is a quick crochet pattern for a spiral necklace crocheted in Bernat organic cotton which is a worsted 10 ply (9 wpi). I used a 4.5 mm or U.S. 7 hook. The soft cotton makes for a light and soft accessory.


Start by loosely chaining 69 stitches. Single crochet in the 4th chain from hook. This will be the loop for your button closure. Then, make 3 single crochets in each of the remaining single crochets to end of chain. This creates the spiral!


Sew on a pretty button for the loop closure. As you can see, I used a wool needle and my cotton yarn to wrap the loop to make it more substantial. But, you may choose to leave it as crocheted.


If you'd like to show off your spiral necklace, post your project on Ravelry from the Spiral Necklace pattern page.

Happy Fiber Art Jewelry!

Friday, May 7, 2010

Fiber Arts and Creative Friday: Share Your Tutorials

Discover Creative Friday over at Natural Suburbia where you can share a crafty tutorial old or new. I decided to link up on Creative Friday with my tutorial for my knitted and felted mini bag.

With my tutorial you can knit this...


And change it into this...


I had fun creating this tutorial, even though it was more work than I expected. Craft Gossip.com featured it. And, I have it up on Ravelry as my one and only design. Three Ravelers have actually chosen it as a project which I think is a hoot! I'm soon going to have a page on my blog for the pattern alone.

Any tutorials to share? Anyone know of other places on the web to share your creativity?

I'm sure there is a ton of fiber creativity over at Wonder Why Gals. See you there!

Happy Tutoring!

Friday, March 26, 2010

A Treat For Me: A Crocheted Ipod Case You Can Crochet Too

I treated myself to one of my crocheted Ipod cases. This cheery yellow one is perfect for spring. This Fiber Arts Friday I'm sharing my simple pattern to make one of your very own.


They are fun to make. Crochet a chain the width of your Ipod allowing for side seams. In single crochet, crochet to a length that wraps down the front and up the back of your Ipod.

You are now ready for the flap. Crochet the flap until you are about three rows away from where you want to stop the length of the flap.


Make the buttonhole on the next row. For the size of my button, I single crochet to the 2 center stitches of the buttonhole row. Now, I chain 2 to skip over these 2 stitches and continue to finish the remaining stitches of the row in single crochet. Crochet 2 more rows making sure to single crochet in the 2 chains of the buttonhole row. You may need to skip more stitches for your buttonhole depending on the size of your button and gauge of your yarn.

Block your work before you sew it up, so it lays flat when you sew the sides.

Sew up the sides using a wool needle and yarn. You may also chain stitch the sides together, which I do, running the chain around the edge of the flap as well.

You'll see in the first picture that I have an opening in the bottom of the case for the headphone jack to plug into my Ipod. With a wool needle and yarn and using the whip stitch, I create a circular opening in between 2 single crochets.

Here is a picture of  the circular opening from another one of my cases so you can get the idea. I push a pencil into the hole to shape it. Then, I spritz it with water leaving the pencil in until it dries to make a sturdy opening.


That's me this Fiber Arts Friday. See more fiber creations at Wonder Why Gals!

Happy crocheting!

Friday, February 19, 2010

Hand Felted, Needle Felted and Ready to Go!: My Mini Bag Unveiled

Ta Da! It's kinda cute, if I do say so myself. With a smart white vintage button and a  bit of needle felting on the flap, my hand felted plum mini bag is finished.


Want one of your own? The free pattern is here. The hand felting process is here.

Visit other fiber adventures this Fiber Arts Friday at Wonder Why Gal's!

Happy Fiber Arting.

Wednesday, February 17, 2010

My Hand Felted Mini Bag

Mop in hand. Rubber gloves on. I have finished hand felting my knit mini bag. These are the tools of the intrepid by hand felter: bucket, mop, rubber gloves, soap and kettle.


I used the hottest water possible boiled in my electric kettle. It's steamy!


After 30 minutes of smashing and mashing my knitting with the mop when the water was too cold, and rubbing my knitting between my rubber gloves when the water reached a bearable temperature, here is the result.


There was still too much stitch definition for my liking. More hot water in the bucket and another 30 minutes of an upper body work out made for a better felted piece of knitting. My result after one hour and then shocking my knitting in cold water (as if boiling water was not shocking enough!).


To shape my bag, a can of pineapple does the job.


On the rack to dry! I'll take the can out to let the inside dry, once the outside feels dry to the touch.


In the meantime, I'm going to choose a button for my bag and plan a needle felted design for the flap!

You can find the free pattern for this bag here on my blog. See it on Ravelry.

A note about using the mop. New mops will shed fiber into your felting. My mop was used (and clean) and did not shed into my felting. I've seen some hand felters use plungers instead. You should use a new one of those...

Happy felting!

Sunday, January 17, 2010

Knit for Who?: My Knitted Owl Hat

Another hat! Yes, this time it's the pattern Who? from Ravelry by Sara Amoroso. I saw this when searching for a pattern for a hat for hubby. I had to knit it. Making owls out of cables made me happy. I love birds. This will officially be my filling the birdfeeders hat.


I used up the rest of the grey Patons Astra I bought for Hubby's ribbed hat. There was no problem with the size using 4mm needles.


Love the cable owls with my vintage buttons for eyes, of course!

What's on my needles now? Another hat!

Happy Knitting!

Sunday, October 25, 2009

Thrummed Mittens: Part Two

Wow! I actually have thrums inside a mitten. After knitting the cuff to my first mitten, I was ready to experience thrumming  for the first time.


Will it ever be safe to go back into my yarn stash again? It's Thrum Jaws!


Its the Great White Mitten for the Great White North.

Thrumming is addictive. I keep looking down inside my mitten to see the secrets hidden inside. I yearn for my next row of thrums.


I think my thrums may be a bit small. But, size isn't everything. Needless to say, I am having fun. I'm getting ready to place my "afterthought" thumb following Yarn Harlot's instructions.

Happy mitten making!

Friday, October 23, 2009

Thrummed Mittens: Part One

I've decided my next  knitting project will be thrummed mittens using Yarn Harlot's pattern from a Thrum-a-long she hosted in 2004! Oh well, better late than never! I found the pattern on Ravelry where you can see pictures of what my mittens should look like when they are finished.

Thrummed mittens are said to originate from Newfoundland and Labrador. Even though I have Newfie connections, I had never heard of them until my Knitting Daily e-mail from Interweave featured them.

I'm using Briggs and Little Hertiage wool in Mulberry for the body of the mittens.


The special and unusual thing about these mittens is that they are lined with thrums or rolled strips of roving which are knit into the mittens on the inside. When finished, you have mittens full of thrums which are extra warm and soft. Great for our Canadian winters!

Here are my first ever thrums! I am so proud.


I'll be casting on soon.

Happy Thrumming!

Thursday, June 25, 2009

How to Knit and Felt a Small Bag

A knitter of any experience level can use this free pattern to knit and felt this small bag. If you haven't felted before, it is so amazing. Before my first felting experience, I was horrified at thought of "ruining" beautiful wool in a bath of hot water. After taking the plunge and felting my first bag many moons ago, I now love the magic of turning knitted fabric into felt.


For this project, you will need 100g (3.5 oz.) of 100% wool yarn, four 5.5 mm (US 9) double pointed needles, 1 button and the usual suspects being scissors, a wool needle and stitch marker.

I used Patons Merino wool knitting with 2 strands throughout the project.

To begin, set up your work to be knit in the round on the double pointed needles. Using two strands of yarn, cast on 42 stitches dividing them evenly around the three needles using your stitch marker to mark the end of each round. I use a fancy key ring for my marker!


Knit in stocking stitch until you have a 7 inches (18 cm) tube.


Next row: *K2 tog. K 10*. Repeat from * to * to the end of the rnd. 38 sts.
Knit 3 more rnds.
Next row: K2 tog to the end of the rnd. 19 sts.
Knit 3 more rnds.
Next row: K2 tog to the end of the rnd. 10 sts.
Knit 1 row.
Next row: K2 tog to the end of the rnd. 5 sts.

Your work should now look like this.

Cut your yarn leaving enough length to thread it through the remaining stitches. Pull these stitches together and sewn in the end. You are now finished the body of the pouch!


You will now make the flap. With the right side of your work facing you and using 2 strands of yarn, pick up 18 stitches on the back of the pouch at the cast on edge. Make certain your stitches are centered.


Knit in stocking stitch for 4 inches (10 cm) ending with a purl row.


Now you are ready to shape the top of the flap.
Next row: K2 tog. Knit to last 2 sts. K2 tog.
Next row: P2 tog. Purl to last 2 sts. P2 tog.
Repeat these two rows until you have 2 sts remaining.


Use these two remaining stitches to make the button loop closure for the pouch. On these two stitches, knit 3 inches (7.25 cm).


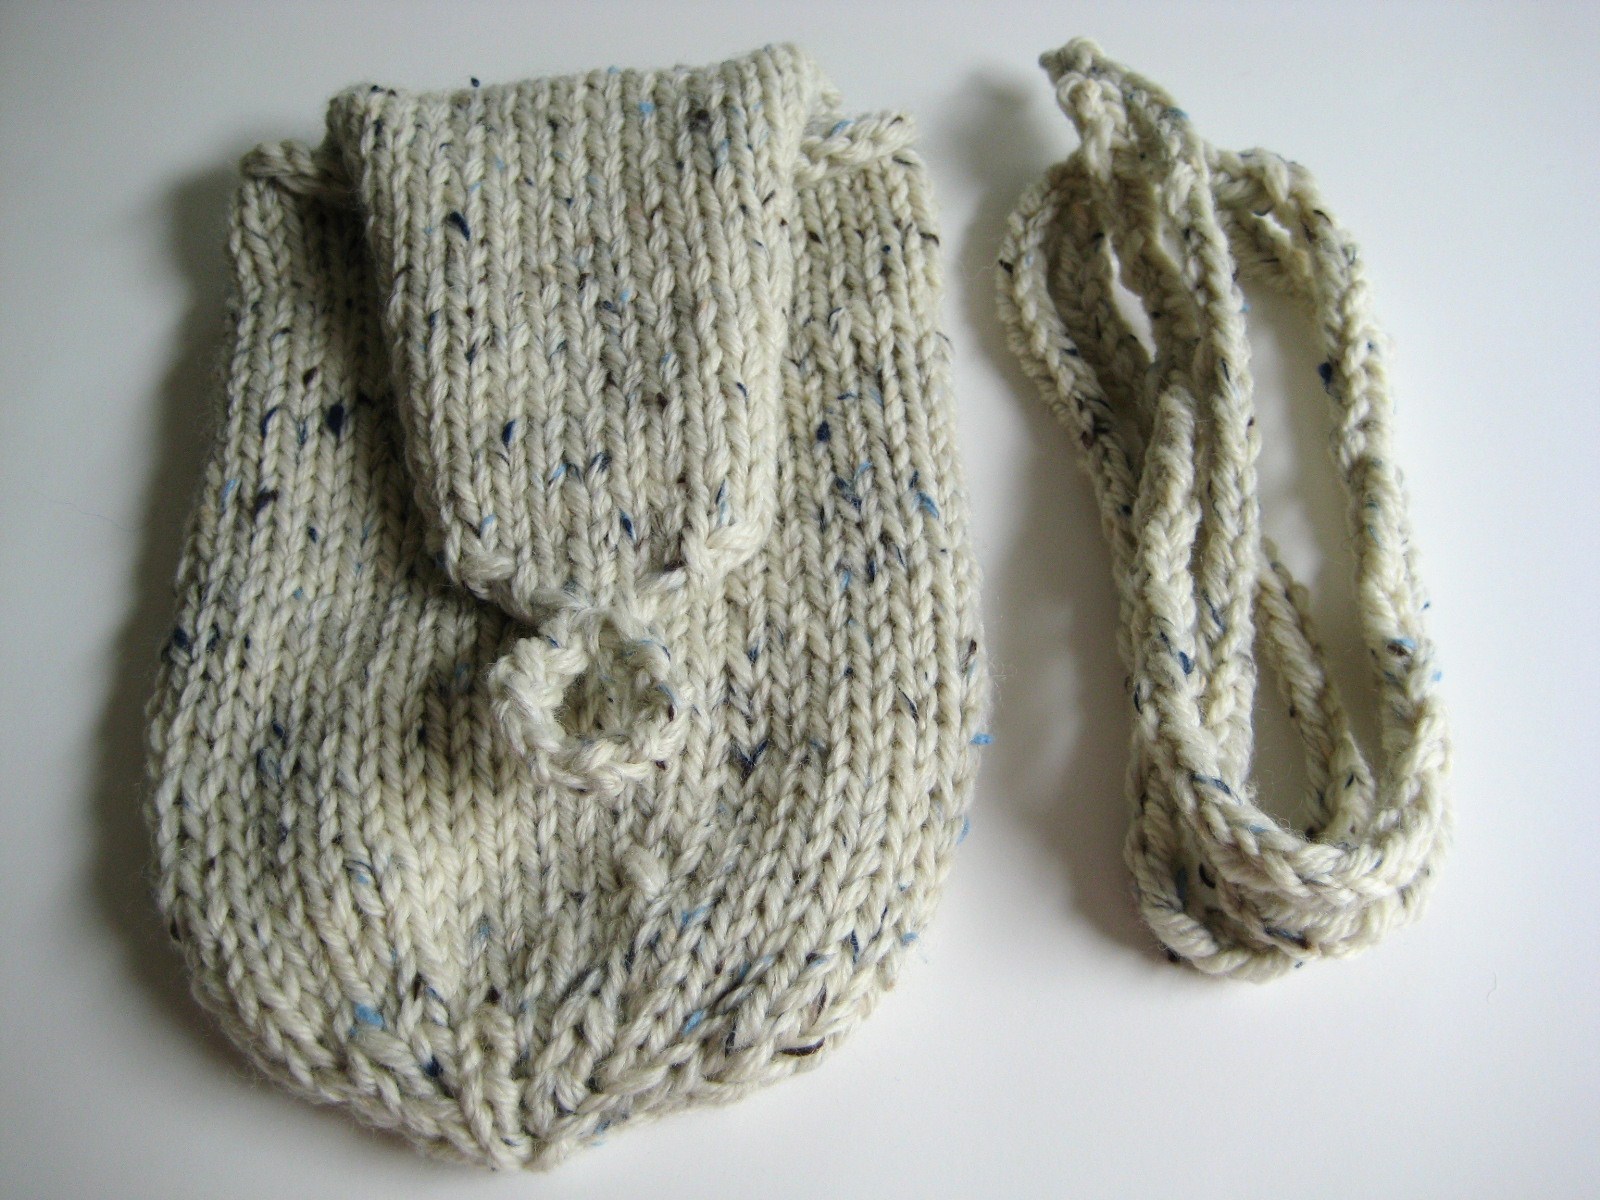
Cast off . Cut your yarn leaving the end long enough to sew the loop into position as seen below.


Make I-cord for the strap of your bag using two of the double pointed needles. With two strands of yarn, cast on 2 sts. Do not turn your work. *Slide stitches to the other end of the needle. Pull yarn to the front of the stitches. Knit 2.* Repeat from * to * until the I-cord measures 48 inches (122 cm). This makes a shorter strap. If you want a longer one, keep sliding those stitches!


Here is the bag and I-cord ready to be felted!


To felt the bag, use the lowest water level and put the hottest water you can into your washer along with a small amount of laundry soap. Place the bag and the I-cord into an old pillowcase tied securely shut with a rubber band. Put the pillowcase and an old pair of jeans (for extra agitation of your wool) into the washer. I set the washer on the highest agitation and the longest cycle.

Check the progress of the felting periodically until the stitching has disappeared and is felted to your liking. I will reset the wash cycle back to the beginning before it goes to the rinse cycle, if my piece needs more time in the washer.

Once you remove your bag from the washer, it should be shaped and left to dry. I put a plastic cup inside mine while it dried to give it shape. I also stretched the length of the I-cord before leaving it to dry.

When dry, position the holes for your strap. Use a knitting needle to poke holes in the side of your bag for the I-cord to be threaded through. Then, choose a pretty button for your closure and enjoy your bag! Happy felting!