Showing posts with label tutorial. Show all posts

Friday, May 21, 2010

Kitchener Stitch, Grafting, Weaving: Whatever!

My first sock is complete. The hardest part of the whole process was understanding the pattern for these Quick and Easy Lounge Socks. As a beginner, if you choose to use this pattern beware of errors in it. One error I found and reported to the designer Liat Gat has been kindly corrected. However, as I went  further into the pattern there were other ambiguities. Luckily, my mom was up to my place for a couple days. Being an expert sock knitter, she was able to guide me through the rough spots.

However, I was on my own for the toe grafting! But look ma, one amazing Kitchener stitched toe from an absolute beginner thanks to the great tutorial at TECHknitting.


TECHknitting shows you how to graft the toe using a knitting needle instead of a tapestry needle. First, I tried the tapestry needle using using another well done tutorial at AC Engineered Knits. But, the result was a loose seam. Using the knitting needle easily gave a weave size the same as the sock's stitches.

One down, one to go!

Happy Fiber Arts Friday at Wonder Why Gals!

Friday, May 7, 2010

Fiber Arts and Creative Friday: Share Your Tutorials

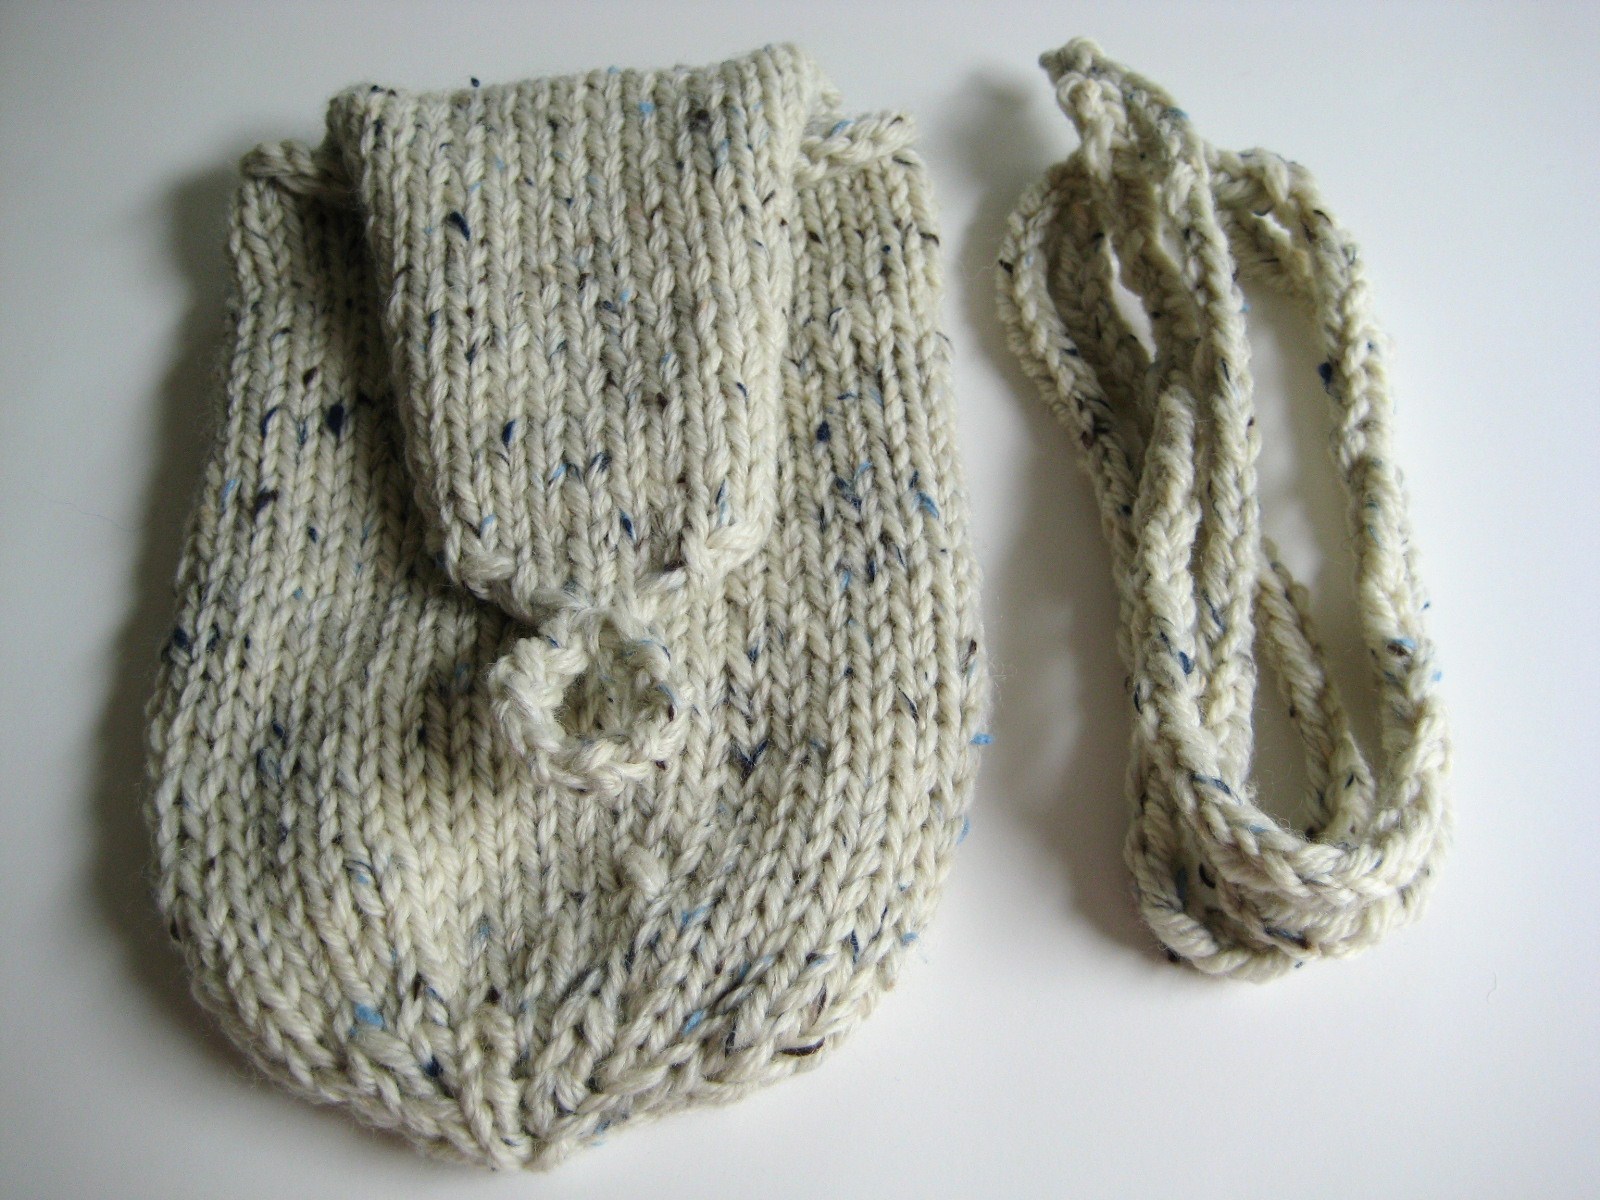
Discover Creative Friday over at Natural Suburbia where you can share a crafty tutorial old or new. I decided to link up on Creative Friday with my tutorial for my knitted and felted mini bag.

With my tutorial you can knit this...


And change it into this...


I had fun creating this tutorial, even though it was more work than I expected. Craft Gossip.com featured it. And, I have it up on Ravelry as my one and only design. Three Ravelers have actually chosen it as a project which I think is a hoot! I'm soon going to have a page on my blog for the pattern alone.

Any tutorials to share? Anyone know of other places on the web to share your creativity?

I'm sure there is a ton of fiber creativity over at Wonder Why Gals. See you there!

Happy Tutoring!

Wednesday, February 17, 2010

My Hand Felted Mini Bag

Mop in hand. Rubber gloves on. I have finished hand felting my knit mini bag. These are the tools of the intrepid by hand felter: bucket, mop, rubber gloves, soap and kettle.


I used the hottest water possible boiled in my electric kettle. It's steamy!


After 30 minutes of smashing and mashing my knitting with the mop when the water was too cold, and rubbing my knitting between my rubber gloves when the water reached a bearable temperature, here is the result.


There was still too much stitch definition for my liking. More hot water in the bucket and another 30 minutes of an upper body work out made for a better felted piece of knitting. My result after one hour and then shocking my knitting in cold water (as if boiling water was not shocking enough!).


To shape my bag, a can of pineapple does the job.


On the rack to dry! I'll take the can out to let the inside dry, once the outside feels dry to the touch.


In the meantime, I'm going to choose a button for my bag and plan a needle felted design for the flap!

You can find the free pattern for this bag here on my blog. See it on Ravelry.

A note about using the mop. New mops will shed fiber into your felting. My mop was used (and clean) and did not shed into my felting. I've seen some hand felters use plungers instead. You should use a new one of those...

Happy felting!

Friday, October 16, 2009

How to Knit Cables: A Knitting Tutorial

Knitting cables has got to be one of my favorite techinques in knitting. Cables look difficult to the uninitiated beginner, but they are quite simple.

This tutorial will show you how to knit  an 8-stitch cable as part of a knit panel. Make many panels and sew them together into an afghan. Make the panel just the right length for a scarf.

To make my panel, I used a medium weight yarn and a pair of  6 mm (10 US) needles. For your cables, you'll also need either a double pointed needle or a cable needle with the funny bend that I suppose is there to prevent your stitches from falling off. I use a plain old double pointed needle for my cable needle which has served me well for an infinite amount of cabling!

To get started:

Cast on 24 stitches. Knit 4 rows of garter stitch ending with a purl row. Next row is the right side of panel.


You are now ready to set up your foundation row for the cabled panel.

1st row: (Right side).  K 4,  P 4, K 8, P 4, K 4
2nd row:  P4, K4, P8, K4, P4

Your work should now look like this:


This is where cable patterns can get scary for first-timers.

3rd row:  K4, P4, C8B, P4, K4

Don't panic! C8B means CABLE 8 BACK. You simply slip the next 4 stitches onto your trusty cable needle and take it to the back of your work. Here is what the cable needle will look like at the back of your work.


Knit the next 4 stitches from the left-hand needle not the cable needle which is still to the back of your work.


This is what your work will look like after you knit the stitches from the left-hand needle.


And then, knit the 4 stitches off of the cable needle.


Your first cable twist complete !

This is what your work will look like when you finish the 3rd row.


4th row:  P4, K4, P8, K4, P4
5th row: As 1st row.
6th row: As 2nd row.
7th row: As 1st row.
8th row: As 2nd row.

These 8 rows complete one cable pattern. Repeat these 8 rows until your panel is the length you want it.

This is what your panel will look like with another cable twist.


To end your panel:  after completing a row 8, repeat 1st and 2nd rows once. Knit 4 rows of garter stitch to match the beginning of the panel and cast off.

For a thrill, try C8F. Bring you cable needle to the front of your work. What happens?

Happy cabling!
Thursday, May 28, 2009

Fiber Jewelry: How To Make Crochet Rings

Designing and wearing your fiber jewelry is a creative way to express your individuality. You choose the technique, texture, colors and embellishments for each piece.

I like using crochet to create my fiber jewelry. Crochet is a fiber art that both beginners and experts can easily use to create beautiful wearable fiber art.

This fiber ring is crocheted from organic white cotton yarn. You can use any fiber as long as it is not too bulky for your finger.

I used a 4.5 mm / U.S 7 crochet hook to work with this medium yarn.

Your best friend for creating crochet rings is the trusty single crochet. This basic stitch is easy to use to give your work structure and a closed stitch.

Start your crochet ring by creating a foundation chain that is long enough to fit around your finger. I made 10 chains with my cotton yarn using a 4.5mm/ 7 U.S. hook. My ring fits an average adult female finger. Remember, your ring will have some stretch room since it is crocheted.

When you have your chain completed, you must join the end of the chain to the beginning to form a ring with a slip stitch. Be careful not to twist your ring, as you are now going to crochet in the round. There will be no seam to sew! See my previous blog post for a photo showing this.

Do not turn as you will be crocheting around the ring.

1st row: Chain (ch) 1 and single crochet (sc) in each ch of the foundation chain. Slip stitch (sl st) to join the end of the round to the beginning of the round.

2nd row: Ch 1. Sc in each sc around. Sl st to join the end of the round with the beginning. Fasten off and weave in your ends. It should look like a ring!

Now, here is the fun part. Embellish your ring. For the fiber ring pictured above, I used a vintage button that has sparkle. You could sew on beads, sequins or use embroidery floss to stitch a design. Happy Crocheting.

Friday, May 22, 2009

Simple Crocheted Flower: How To Tutorial

This crocheted flower is a simple design great for beginners. I learned this pattern years ago. Many flowers later, I now know it off by heart.

Crocheted flowers can be made by the dozens and sewn or slip stitched together during crocheting at the tips of the petals to make scarves, shawls or throws. Your imagination is your only limitation on what you can create.

My pretty blue flower was crocheted in a soft merino wool using a size 4.5 mm or 7 crochet hook.

You can use whatever fiber you like. This flower is also nice crocheted in soft cotton yarn or a fuzzy mohair. Use whatever you have in your yarn stash to practice. For this single flower, gauge is not important. Yeh!

To start: Chain (ch) 4 and join with a slip stitch (st st) to form a ring.


Round One: Ch 4. Then make *1 half double crochet (hdc) into the ring and ch 3*. Repeat from * to * 5 times. Join to the beginning (beg) of the round with a sl st into the 2nd ch of the ch 4 that you started the round with. You should have 6 loops. Your work should now look like this:

Round 2: You are now going to add petals to your blooming flower. In each of your 6 loops, make 1 single crochet (sc), 1 hdc, 1 double crochet (dc), 1 hdc, 1sc. Join to the beg of the round with a sl st in the 2nd ch of the ch 4 you started the round with. I hope your flower now looks like this:

Round 3: In this round, you will be making chains behind each petal. As in the photo below, ch 4.


Then, taking the chain behind the petal, insert your hook into the front of and between the 2 sc of that petal and the next petal.


Now, make a sl st between the 2 petals.


Repeat this around the flower creating a ch 4 behind each petal. When you reach the end of the round, join with a sl st in first sc at the beg of the round. The back of your flower should look like this:


Round 4: The last one! You now have 6 loops created by your series of ch 4s. Into each of these loops make the following group of stitches: 1 sc, 1 hdc, 3 dc, 1 hdc, 1 sc. Once again, at the end of the round, join to the beg with a sl st into the first sc at the beg of the round.

Ta dah! Now cut that yarn, lock that chain and neatly sew in your ends.


If you are looking for a good online instructions for how to crochet, you might want to visit Crochet Guild of America. Happy crocheting.